
Windows Sandbox is a useful place to inspect an unfamiliar installer, attachment, or utility when you need to open it but do not want it running in your normal desktop session. For a lower-exposure setup, launch Sandbox with networking and clipboard redirection disabled, then give it access only to a dedicated read-only folder containing the test copy.
This is risk reduction, not proof that a file is safe. Do not use it for a file you already know is malicious, do not enter real credentials, and do not move files produced by an untrusted program back to the host simply because Sandbox closed cleanly. Keep Microsoft Defender and normal update protections enabled.
What Windows Sandbox does and does not do
Windows Sandbox is a temporary isolated Windows desktop that uses hardware-based virtualization. It starts with a clean environment, and its apps, files, and state are deleted when you close it. That makes it appropriate for a one-session check of a download that is unfamiliar but necessary to inspect. Microsoft documents the disposable design and notes that Windows Home is not supported.
A normal Sandbox session is not the same as an offline, no-sharing test environment. Networking and clipboard redirection are enabled by default. Networking can give an untrusted app a route to your local network or the internet, while clipboard sharing makes it easier to accidentally transfer data between the host and Sandbox. Use a configuration file rather than relying on the defaults. Microsoft’s Sandbox configuration documentation describes these defaults and the available controls.
Check that your PC can run it
- Use a supported non-Home edition, such as Windows 11 Pro, Enterprise, or Education. Windows Home does not include Windows Sandbox.
- Make sure hardware virtualization is enabled in the PC’s BIOS or UEFI firmware.
- Allow adequate resources. Microsoft’s published baseline is at least two CPU cores, 4 GB of RAM, and 1 GB of free disk space; 8 GB of RAM is recommended.
- Expect availability to vary on managed work devices, where organizational policy can limit optional Windows features.
To enable it, search Windows for Turn Windows features on or off, select Windows Sandbox, choose OK, and restart if Windows asks. Then search Start for Windows Sandbox. If the feature is missing, first check the Windows edition, the virtualization prerequisite, and any device-management restrictions rather than changing firmware settings at random. Microsoft’s installation guide lists the supported prerequisites and optional-feature installation steps.
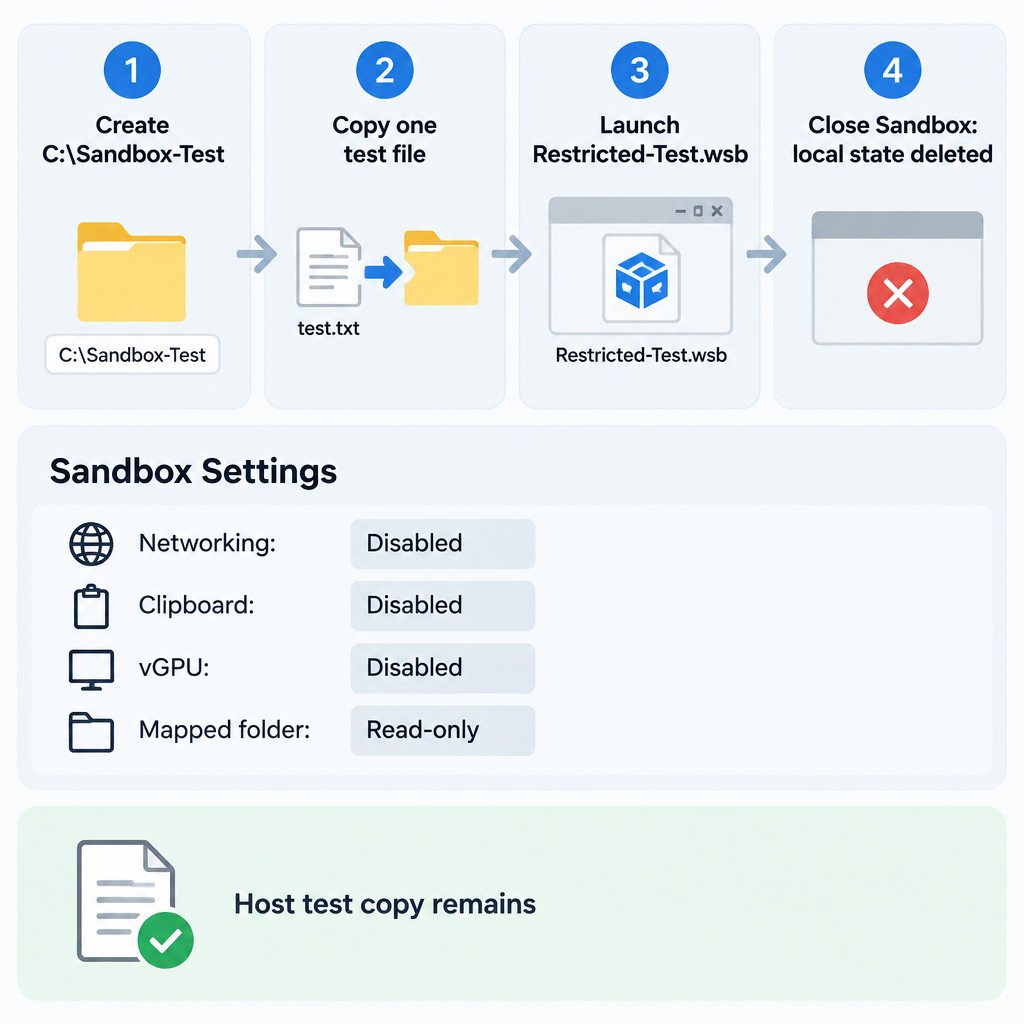
Create a restricted Sandbox configuration
First, create a dedicated folder on the host, for example C:\Sandbox-Test. Copy only the download you want to inspect into that folder. Do not point Sandbox at Downloads, Documents, OneDrive, or another folder that contains unrelated personal or work files.
Next, open Notepad and save the following as Restricted-Test.wsb. Be sure the extension is .wsb, not .txt. This is an illustrative configuration: replace the host path only if you use a different folder, and ensure that folder already exists.
<Configuration>
  <Networking>Disable</Networking>
  <VGpu>Disable</VGpu>
  <ClipboardRedirection>Disable</ClipboardRedirection>
  <MappedFolders>
    <MappedFolder>
      <HostFolder>C:\Sandbox-Test</HostFolder>
      <SandboxFolder>C:\TestFiles</SandboxFolder>
      <ReadOnly>true</ReadOnly>
    </MappedFolder>
  </MappedFolders>
  <LogonCommand>
    <Command>explorer.exe C:\TestFiles</Command>
  </LogonCommand>
</Configuration>