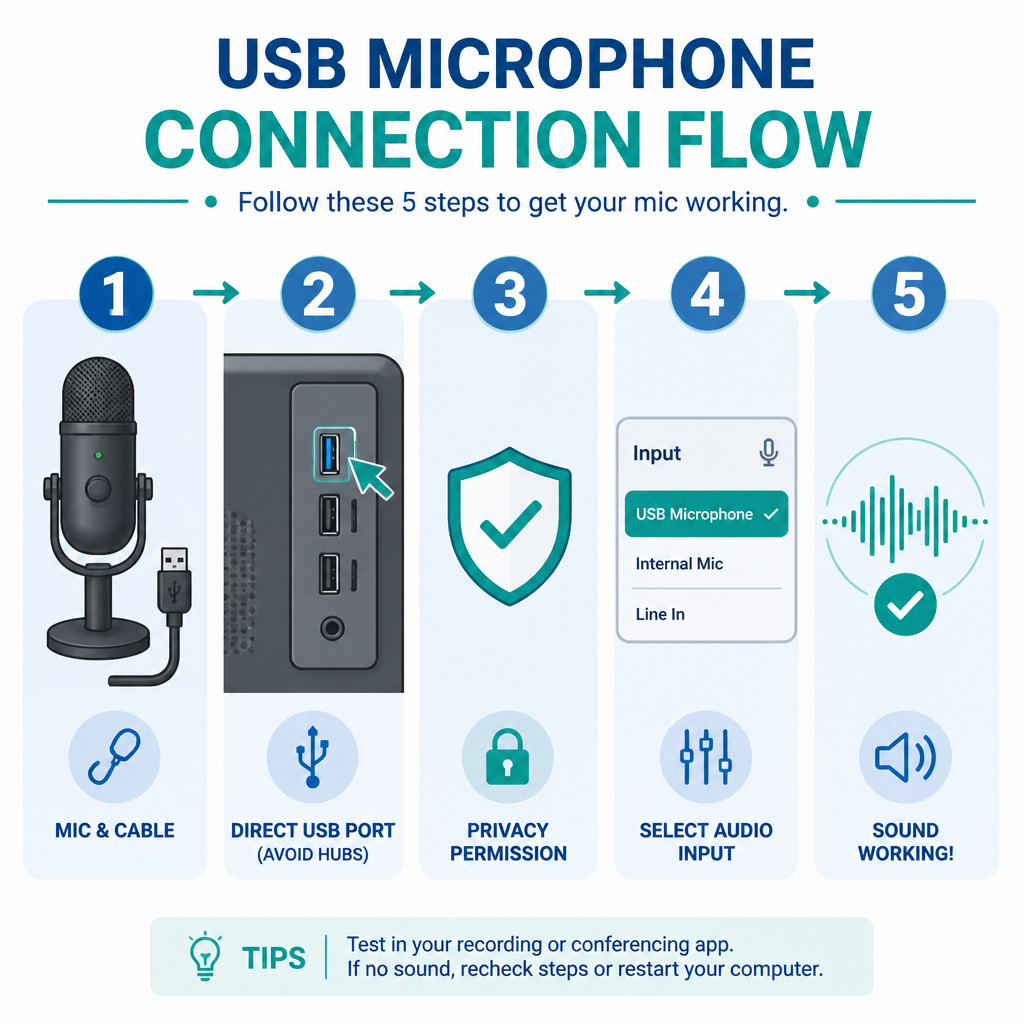
If your USB microphone is not detected, plug it directly into a different USB port, restart the computer, and choose it as the system input device. Still missing? Check microphone privacy permissions, disconnect potentially conflicting audio devices, and reinstall or update the device in Windows. On a Mac, make sure the microphone appears in Audio MIDI Setup and that the application has permission to use it.
Before changing settings, work out whether the microphone is completely absent or visible but producing no sound. A missing device generally points to a USB connection, power, cable, driver, or hardware issue. If the device appears but has no input, the cause is more likely to be permissions, input selection, gain, or application settings.
Check the USB connection first
- Disconnect the microphone, then restart the computer.
- Plug it directly into a USB port on the computer rather than using a hub, dock, monitor, or keyboard.
- Test every compatible USB port. On a desktop computer, try one of the rear motherboard ports.
- If the microphone uses a detachable cable, replace it with a data-capable cable. Some USB cables only supply power.
- Temporarily disconnect other nonessential USB audio devices, webcams, headsets, and capture cards.
Don’t assume the connection is working just because the microphone lights up. A power-only cable or underpowered hub may illuminate the device while blocking USB data transfer.
Fix a USB microphone not detected in Windows 11
Choose the correct input device
- Open Settings.
- Choose System, followed by Sound.
- Find the Input section and select the USB microphone.
- Speak into the microphone while watching the input volume meter.
- Open its properties and raise Input volume if needed.
If the microphone is listed here and the meter moves when you speak, Windows is detecting it properly. You’ll also need to select that same microphone inside your recording, meeting, streaming, or communication application.
Allow access to the microphone
- Open Settings, select Privacy & security, and then choose Microphone.
- Turn on Microphone access.
- Allow access for applications and desktop applications.
- Close the affected application and reopen it after changing these permissions.
Inspect the device in Device Manager
- Right-click Start and select Device Manager.
- Expand Audio inputs and outputs, Sound, video and game controllers, and Universal Serial Bus controllers.
- Check for the microphone, an unknown device, or an entry displaying a warning symbol.
- Right-click the affected entry and choose Uninstall device.
- Unplug the microphone, restart Windows, and connect it again.
Most class-compliant USB microphones rely on drivers already included with Windows. If your exact model requires a dedicated driver or control application, get it only from the manufacturer’s official website.
Turn off USB power saving
USB power management may be the problem if the microphone disappears after sleep or disconnects from time to time.
- In Device Manager, expand Universal Serial Bus controllers.
- Open the properties for each relevant USB Root Hub or Generic USB Hub.
- Go to the Power Management tab and clear Allow the computer to turn off this device to save power.
- Restart the computer, then test the microphone again.
This option doesn’t appear for every hub. If you’re unsure which hub controls the microphone, avoid changing settings for unrelated devices.
Fix a USB microphone not detected on a Mac
Select it in Sound settings
- Open the Apple menu and choose System Settings.
- Select Sound and find the input section.
- Choose the USB microphone.
- Adjust its input level, then speak into it and watch the level indicator.
Give the application microphone permission
- Open System Settings and go to Privacy & Security.
- Select Microphone.
- Enable access for the application that needs to use the microphone.
- Quit the application and open it again.
If you don’t see the application in the list, launch it and try to use its recording feature. macOS should ask for permission the first time the application attempts to access the microphone.
Look in Audio MIDI Setup
- Open Applications, go to Utilities, and launch Audio MIDI Setup.
- Find the USB microphone in the list of audio devices.
- Select it and check that its input channels are active.
- If the current format is causing compatibility trouble, choose a standard supported sample rate such as 44.1 kHz or 48 kHz.
When the microphone appears in Audio MIDI Setup but is missing from one application, that application’s permissions or input selection are probably responsible. If the device doesn’t appear anywhere, focus instead on the cable, adapter, USB port, power supply, and microphone hardware.
Review the application’s audio settings
Video meeting, recording, gaming, and browser applications can ignore the system default. Open the application’s audio settings and select the USB microphone by name instead of leaving the input set to Default or Automatic.
- Close any other applications that might be using the microphone exclusively.
- Look for a physical mute button or touch-sensitive mute control.
- Gradually turn up the microphone’s hardware gain knob.
- For browser-based tools, check the microphone permission for that specific website.
- Temporarily turn off virtual audio devices or audio-routing software.
Find out whether the microphone is faulty
Using a known-good data cable, connect the microphone to another Windows PC or Mac. If it fails on multiple computers and never appears in the system audio settings, Device Manager, or Audio MIDI Setup, the microphone or its USB connector is probably defective.
If it works on another computer, go back to the original machine and remove hubs, adapters, extension cables, and conflicting audio software one at a time. When using a USB-C adapter, make sure it explicitly supports data and isn’t designed only for charging.
Common mistakes to avoid
- Assuming an illuminated microphone has a working data connection.
- Using a USB cable that supports charging only.
- Plugging the microphone into an unpowered hub shared with several high-power devices.
- Changing output settings even though the problem affects audio input.
- Selecting the microphone in the operating system but not in the application.
- Downloading drivers from third-party driver-download websites.
Frequently asked questions
Why is my USB microphone not detected when its light is on?
The microphone may be getting power without transferring any data. Test another data-capable cable, connect it directly to a USB port, and try it on a different computer. A defective hub or USB adapter can produce the same symptoms.
Does a USB microphone need a driver?
Most USB microphones are class-compliant and work with the audio drivers built into Windows and macOS. Certain models need manufacturer software for advanced routing, firmware updates, effects, or extra channels.
Why does the microphone appear in settings but record no sound?
Check the microphone’s mute control, hardware gain, operating-system input level, privacy permissions, and the input selected inside the application. With a directional microphone, also make sure you’re speaking into the correct side.
Can a USB hub stop a microphone from working?
Yes. The hub might not supply enough power, may create an unstable connection, or may not handle the device correctly. Always test the microphone directly on the computer before replacing or reconfiguring it.