
A VPN is working properly when websites see the VPN server’s public IP address, DNS requests don’t reach your internet service provider, and your traffic either stops or stays protected if the tunnel drops. Test each of these separately. A changed IP address alone doesn’t rule out DNS, WebRTC, or IPv6 leaks.
Quick VPN testing checklist
- Disconnect the VPN and note your normal public IPv4 and IPv6 addresses.
- Connect to a VPN server in a known location.
- Check that your visible public IP changes to the VPN server’s address.
- Run an extended DNS leak test and review the resolver operators.
- Inspect the WebRTC addresses reported by your browser.
- Make sure IPv6 is either tunneled or unavailable while the VPN is connected.
- Interrupt the VPN connection and verify that the kill switch blocks traffic.
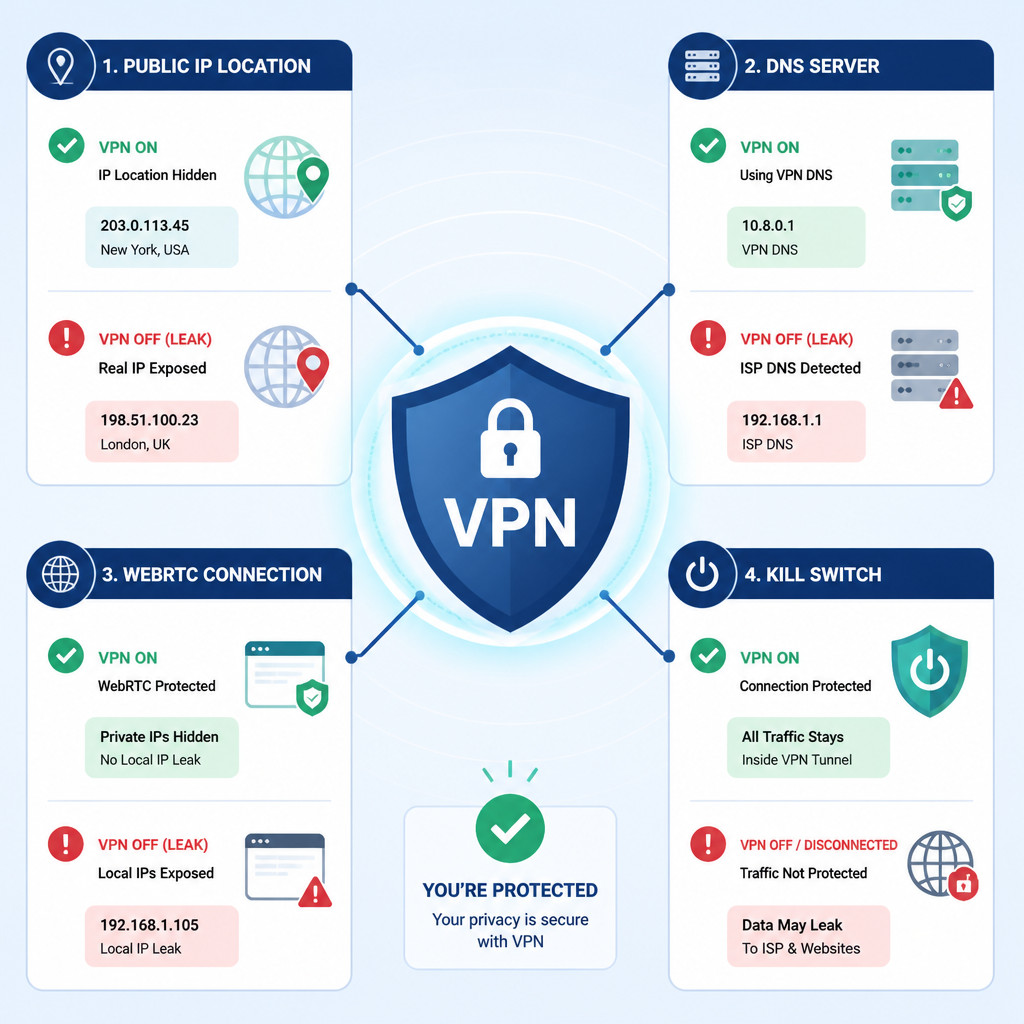
Run these tests in a private browser window to reduce the chance of seeing cached results. For a stronger check, repeat them in two browsers and on every network you regularly use, including home Wi-Fi, public Wi-Fi, Ethernet, and mobile data.
Record your normal connection details
Before you connect to the VPN, open a reputable IP-checking service and record:
- Your public IPv4 address
- Your public IPv6 address, if the service displays one
- Your approximate city, region, and internet service provider
- The DNS resolver names listed by an extended DNS test
Search for what is my IP, or visit a dedicated service such as IPinfo. For DNS testing, choose a service that makes multiple queries, such as DNSLeakTest or BrowserLeaks. This baseline helps you spot information tied to your normal connection that remains visible after you turn on the VPN.
Check the VPN’s public IP address
- Connect to the VPN server you want to use.
- Reload the IP-checking page in a private browser window.
- Verify that the displayed address is different from your baseline.
- Check whether the reported provider belongs to a hosting company or the VPN’s network rather than your home ISP.
- Make sure the approximate location matches the VPN region you selected.
IP geolocation databases aren’t perfectly accurate. If the result shows a nearby city or an outdated region, that doesn’t automatically mean your connection is leaking. What matters is that your normal public IP address is no longer visible.
If your original IPv4 address still appears, disconnect and reconnect the VPN. If that doesn’t fix it, restart the VPN application. You should also check whether another VPN, proxy, security suite, or manually configured network adapter is interfering with the route.
Run a DNS leak test
DNS translates domain names into IP addresses. A DNS leak happens when those requests bypass the protected connection and reach a resolver linked to your ISP or local network.
- Leave the VPN connected.
- Open an extended DNS leak testing service.
- Run the full test instead of relying on the first server shown.
- Compare every resolver name and address with your baseline results.
A passing test will usually show resolvers run by the VPN provider or by a third-party DNS service the VPN intentionally uses. Results from Google, Cloudflare, or another public resolver don’t automatically indicate a leak. The warning sign is an unexpected resolver associated with your ISP, employer, school, or local network.
If you find a leak, turn on the VPN application’s DNS protection setting, temporarily remove any manually configured DNS servers, and reconnect. Browser features such as Secure DNS or DNS over HTTPS can also produce results that differ from the VPN’s assigned resolver. That may be intentional, but the browser’s DNS traffic should still pass through the VPN tunnel.
Look for WebRTC leaks
WebRTC lets browsers create real-time voice, video, and peer-to-peer connections. While discovering available connections, the browser may expose network addresses to a webpage.
- Connect the VPN and open a WebRTC leak test page.
- Check the results for public and local IP candidates.
- Compare any public address with both your baseline IP and the current VPN address.
The test passes when any exposed public address belongs to the VPN server. Private addresses such as 192.168.x.x, 10.x.x.x, or 172.16.x.x through 172.31.x.x identify a local network and can’t be reached directly from the internet. Many current browsers replace local addresses with temporary mDNS hostnames instead.
If the test reveals your normal public IP, start by updating the browser and VPN application. Next, enable the VPN’s leak protection feature or restrict WebRTC in the browser. Disabling WebRTC entirely can break browser-based calling, conferencing, and screen-sharing tools, so reserve that option for cases where it’s necessary.
Check for an IPv6 leak
Some VPNs protect IPv4 traffic while allowing IPv6 to travel outside the tunnel. With the VPN connected, run an IP test that reports both protocols.
- If you see a VPN-provided IPv6 address, the VPN is tunneling IPv6.
- If no IPv6 address appears, the VPN may be blocking IPv6 safely.
- If your baseline IPv6 address appears, traffic is leaking outside the tunnel.
Turn on IPv6 leak protection if your VPN provides it. If the service can’t tunnel or block IPv6, you can temporarily disable IPv6 on the active network adapter. Treat this as a workaround rather than the preferred fix, since some local networks and applications increasingly rely on IPv6.
Test the VPN kill switch
A kill switch is meant to prevent unprotected internet access when the VPN tunnel fails unexpectedly. Before running the test, enable the feature in the VPN application’s settings.
- Connect to the VPN and confirm that the VPN IP address is visible.
- Begin loading or repeatedly refreshing an IP-checking page.
- Force the tunnel to drop by switching VPN servers or briefly disabling and re-enabling the active Wi-Fi or Ethernet connection.
- Watch the connection while the VPN reconnects.
The kill switch passes the test if internet traffic stays blocked until the protected tunnel returns. It fails if a page loads over your normal ISP connection or your baseline IP address appears during reconnection.
Some kill switches work only during unexpected failures and intentionally allow internet access after you click Disconnect. Other applications include an always-on mode that blocks traffic whenever the VPN isn’t active. Check how your application behaves, and choose always-on protection if you need traffic blocked after restarts or manual disconnections as well.
Why VPN leak tests can fail
- Split tunneling: The browser or test application may have been intentionally excluded from the VPN.
- Multiple VPN clients: Old virtual adapters and competing routing rules can direct traffic through the wrong interface.
- Browser Secure DNS: Your browser may use a different resolver from the one assigned by the VPN.
- Unsupported IPv6: The VPN may tunnel IPv4 without blocking IPv6 traffic.
- Extension-based VPNs: A browser extension may protect only browser traffic while leaving other applications unchanged.
- Cached test results: The page may show stale location or DNS details until you reload it or reopen it in a private window.
Frequently asked questions
How can I tell if my VPN is working?
Compare your public IP address before and after connecting. A working VPN should replace your normal public IP with the VPN server’s address. You’ll still need to test DNS, WebRTC, IPv6, and kill switch behavior, since an IP change doesn’t prove that every type of traffic is protected.
Does a different DNS provider always mean there’s a VPN leak?
No. A VPN may intentionally use its own resolvers or public services such as Cloudflare and Google. A leak is more likely when the test shows a resolver tied to your usual ISP or a local organization and you didn’t configure it yourself.
Why does the VPN show the wrong city?
IP geolocation databases may be outdated or assign an address to a nearby city. If the visible address belongs to the VPN network and your normal IP remains hidden, a small location mismatch usually isn’t evidence of a leak.
Do I need to test every VPN server?
You don’t have to check every server, but you should test each server type you use regularly, including standard, streaming, multi-hop, and obfuscated modes. Run the checks again after major updates to the VPN application, browser, or operating system.
