If Windows starts normally but built-in features fail, system apps crash unexpectedly, or you see messages about damaged system files, run DISM first and SFC second. DISM repairs the component store that Windows can use as a repair source; SFC then checks protected system files and replaces damaged versions when it can.
These commands are a targeted repair, not a general cure-all. They are appropriate for suspected Windows component or protected-file corruption. They are less likely to help when only one third-party application is broken, a hardware problem is causing crashes, malware is present, or Windows cannot start at all.
Before you begin
This workflow assumes you can sign in to Windows and use an administrator account. Save open work, install available Windows updates, and restart once before beginning. Microsoft’s end-user guidance uses the same update, restart, DISM, then SFC sequence.
- Close files and apps with unsaved work.
- Connect to the internet if possible. A standard online DISM repair can use Windows Update when applicable.
- Open an elevated command window: search for Terminal or Command Prompt, then select Run as administrator.
- Approve the User Account Control prompt.
Do not use this process to replace individual DLLs or other system files downloaded from random websites. The tools are designed to verify and repair files through Windows’ own servicing mechanisms.
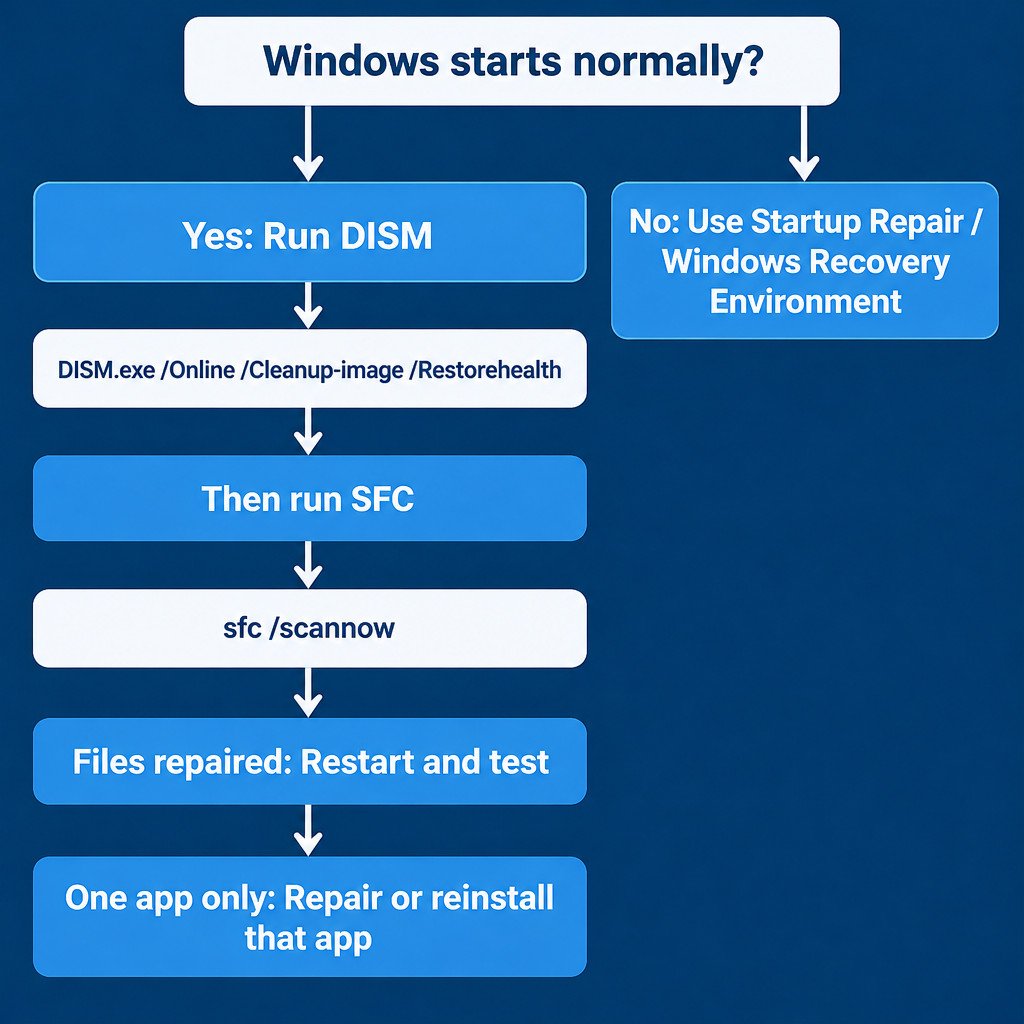
Step 1: Repair the component store with DISM
In the administrator command window, enter the following command and press Enter:
DISM.exe /Online /Cleanup-image /Restorehealth/Online means the Windows installation currently running on the PC. /Cleanup-image targets Windows image servicing, and /Restorehealth scans for component-store corruption and attempts a repair. Leave the window open until the command finishes; it may take several minutes.
For a typical connected PC, do not add extra switches. Microsoft documents that DISM can use configured repair sources and Windows Update when applicable. The more advanced /Source and /LimitAccess options are for cases where a suitable local repair source is required. That source must match the installed Windows version closely enough to provide valid repair files, so it is best treated as an escalation task rather than a first attempt.
Technical reference: Microsoft’s DISM Windows image repair documentation.
Step 2: Check protected system files with SFC
After DISM completes, run:
sfc /scannowSFC, short for System File Checker, verifies protected Windows system files. Keep the command window open until verification reaches 100%. Running it after DISM matters because SFC may need a healthy component store from which to restore a protected file.
What the SFC result means
| Result | Practical next action |
|---|---|
| Windows Resource Protection did not find any integrity violations. | Protected Windows files appear intact. Investigate the specific app, driver, account setting, or hardware symptom instead. |
| Windows Resource Protection found corrupt files and successfully repaired them. | Restart, then test the original problem. No further command is usually needed unless the problem returns. |
| Windows Resource Protection found corrupt files but was unable to fix some of them. | Restart and run DISM, then SFC, once more if you did not already follow that order. If it persists, collect the log details and move to recovery options rather than repeatedly running commands. |
| Windows Resource Protection could not perform the requested operation. | Do not assume corruption is the only cause. A restart may be worth trying; persistent cases need a more specific recovery or startup diagnosis. |
These messages and the DISM-before-SFC order come from Microsoft’s System File Checker instructions. A successful command does not prove that every Windows problem has been fixed; it only reports the outcome of that tool’s file and component repair work.
If SFC cannot repair everything, save useful evidence
Rather than editing system files by hand, extract SFC-related entries from the CBS log. Run this in the same elevated command window:
findstr /c:"[SR]" %windir%\Logs\CBS\CBS.log >"%userprofile%\Desktop\sfcdetails.txt"This creates sfcdetails.txt on the current user’s desktop. It is evidence for a support case or a careful next diagnosis, not a shopping list of files to download and replace. The log can contain technical detail without identifying the underlying cause on its own.
Know when DISM and SFC are the wrong tools
- One app fails, while Windows is otherwise normal: use that app’s repair, reset, update, or reinstall options first. Back up any app-specific data where relevant.
- Windows will not boot: enter the Windows Recovery Environment and use Startup Repair. It is intended for common startup issues, including damaged system files and boot configuration problems.
- Crashes coincide with disk warnings, overheating, random restarts, or failing peripherals: investigate storage, memory, drivers, power, and other hardware separately. File repair commands do not repair physical hardware.
- The issue returns after successful repairs: back up important files and consider Windows recovery or reinstallation options. Repeated scans without a new diagnosis can waste time.
For a PC that cannot start, follow Microsoft’s Startup Repair guidance rather than trying the normal online workflow from a Windows desktop.
A short decision checklist
- Several Windows features are malfunctioning, but you can sign in: run DISM, then SFC.
- SFC repaired files: restart and retest the original symptom.
- Only one non-Microsoft app is affected: troubleshoot that app instead.
- Windows cannot start: use Startup Repair in Windows Recovery Environment.
- Corruption persists or important data is at risk: back up files before choosing broader recovery or reinstallation steps.
For the basic command sequence and preparation steps, see Microsoft’s current SFC support page.