Connect and Use HeidiSQL with MySQL
To use HeidiSQL with a MySQL database, you will need to install HeidiSQL on your computer and have access to a MySQL database server. You can get the latest version of HeidiSQL from the official download site.
Once you have installed HeidiSQL and have access to a MySQL database server, you can use HeidiSQL to connect to the database and perform various tasks such as browsing and editing data, running SQL queries, and importing and exporting data.
Note: This guide is for 127.0.0.1 (localhost) connection. To connect the HeidiSQL client to MySQL hosted on the website or remote server you will need to add your IP address to allows list. See How to Use HeidiSQL to Connect to a MySQL Database
To connect to a MySQL database using HeidiSQL, follow these steps:

- Open HeidiSQL.
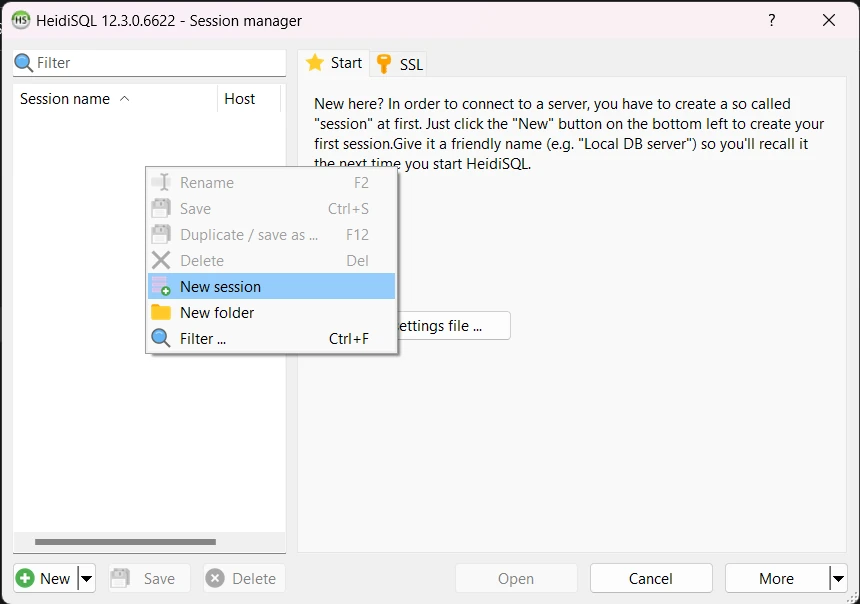
- In the “Session Manager” window, click the “New” button to create a new session.
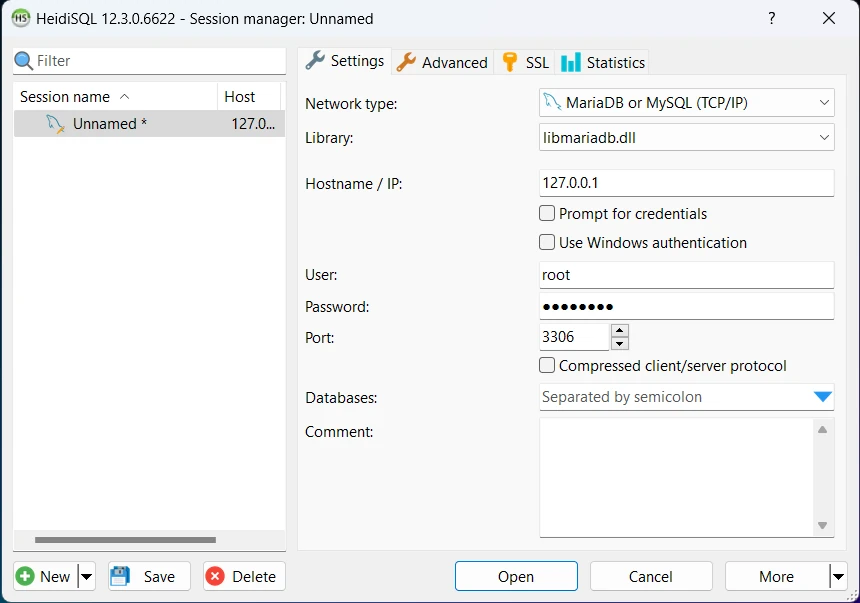
- In the “Create new session” dialog, enter the following information:

- Hostname: The hostname of the MySQL server you want to connect to. This can be an IP address or a domain name.
- Port: The port number of the MySQL server. The default port number for MySQL is 3306.
- User: The username you want to use to connect to the MySQL server.
- Password: The password for the specified user.
- Optionally, you can specify a default database for the session by entering the name of the database in the “Database” field.
- Click the “Save” button to save the session and connect to the MySQL database.
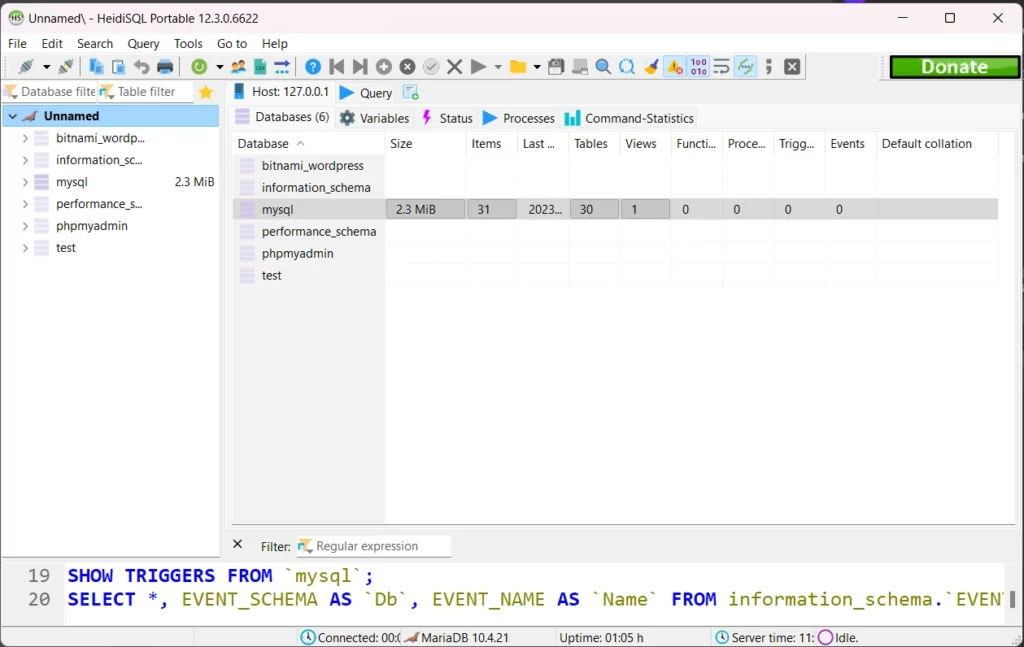
If the connection is successful, you will see a list of databases in the left pane of the HeidiSQL window. You can then navigate to the tables and views in the database by expanding the tree in the left pane.

From there, you can use the various tabs and features in HeidiSQL to browse and edit data, run SQL queries, and import and export data.
If you get “Access Denied For User ‘username’@’host’ (using Password: YES)” error after attempting to connect please refer to this guide.
How to Use HeidiSQL Options
Here are a few more things you can do once you are connected to a MySQL database using HeidiSQL:
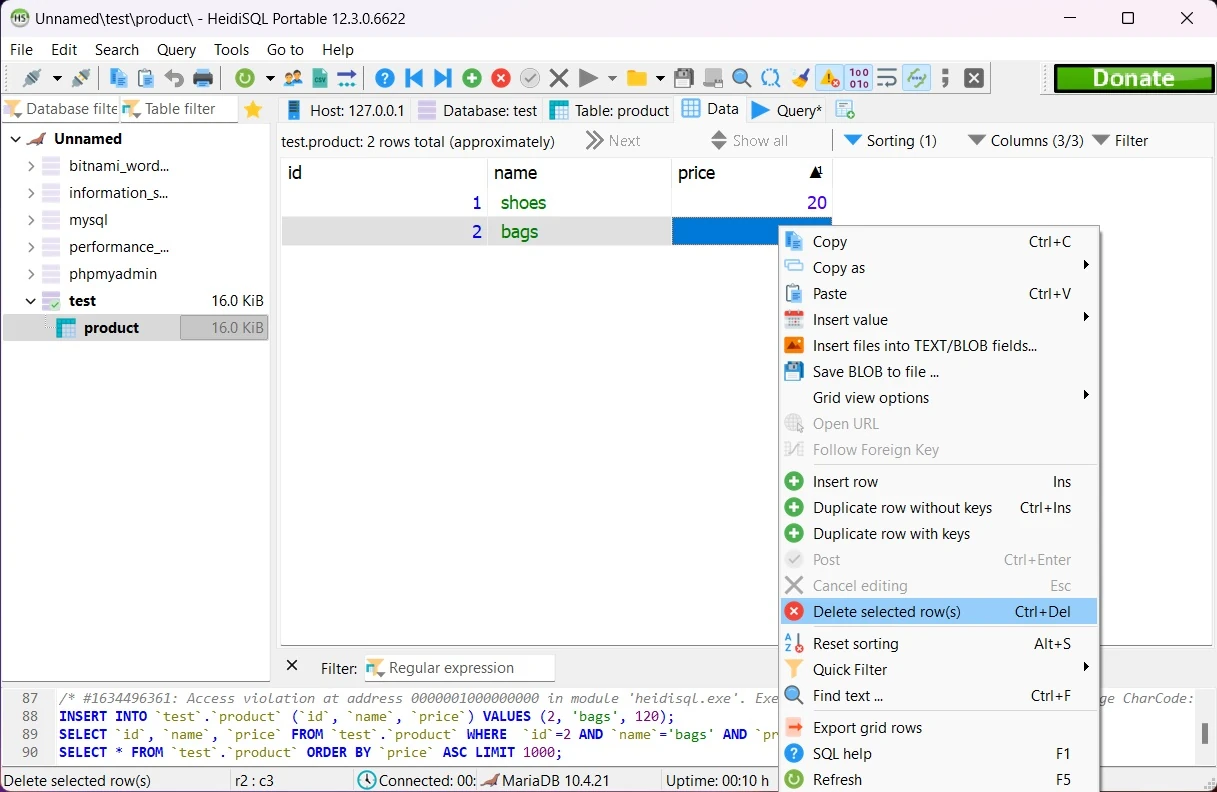
- Browse data: To browse the data in a table, navigate to the table in the left pane and click on it. The data in the table will be displayed in the right pane. You can also use the “Filter” field at the top of the grid to search for specific records.
- Edit data: To edit the data in a table, navigate to the table and click on a cell to edit its value. You can also use the “Edit” tab in the right pane to edit multiple records at once.
- Run SQL queries: To run a SQL query, click the “Query” tab in the right pane and enter the query in the text field. Then, click the “Execute” button to run the query. The results of the query will be displayed in the grid below the text field.
- Export data: To export data from a table or a query to a file, click the “Export” tab in the right pane and select the data you want to export. Then, choose the format you want to export the data to (such as CSV or SQL) and specify the location where you want to save the file. Click the “Export” button to export the data.
- Import data: To import data from a file into a table, click the “Import” tab in the right pane and select the file you want to import. Then, choose the format of the file (such as CSV or SQL) and specify the table where you want to import the data. Click the “Import” button to import the data.


