Microsoft Word is a widely used word processing software that can be used for creating and editing documents in various languages, including Hindi. One way to write in Hindi in MS Word is by using the Hindi Phonetic Keyboard. Here’s a step-by-step guide on how to write in Hindi in MS Word using the Hindi Phonetic Keyboard.
Steps to write in hindi in ms word
Step 1: Install Hindi Language
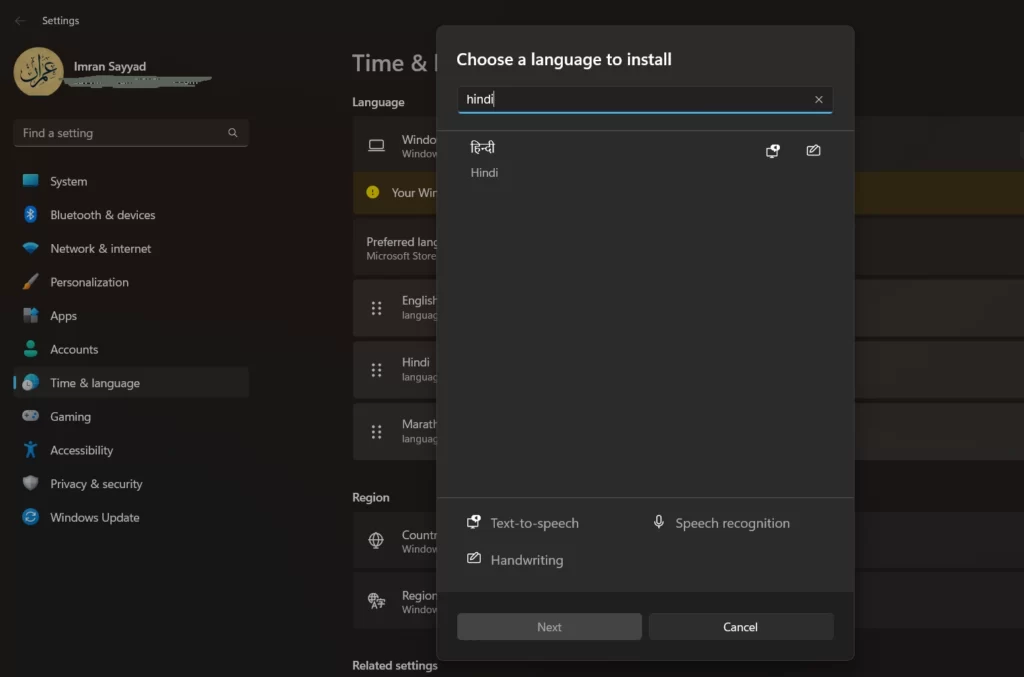
The first step in writing in Hindi in MS Word is to make sure that Hindi language support is installed on your computer. To do this, go to the “Control Panel” and click on “Clock, Language, and Region.” Next, click on “Add a Language” and select “Hindi” from the list. Then install it.
or, Settings->Time and Language > Language & Region in Windows 11

Step 2 : Setup Hindi Phonetic Keyboard
The Hindi Phonetic Keyboard is a popular keyboard layout that allows users to type in Hindi using the English alphabets. Here’s a step-by-step guide on how to set up and use the Hindi Phonetic Keyboard Layout in Windows 11.

- Click on the Start menu and select “Settings.” In the Settings menu, click on “Time & Language.”
- In the Time & Language menu, select “Languages” from the left-hand side menu. Click on “Add a Language” and select “Hindi” from the list.
- (Optional) After adding Hindi, select it and click on “Set as Default.” This will make Hindi the default language for your computer.
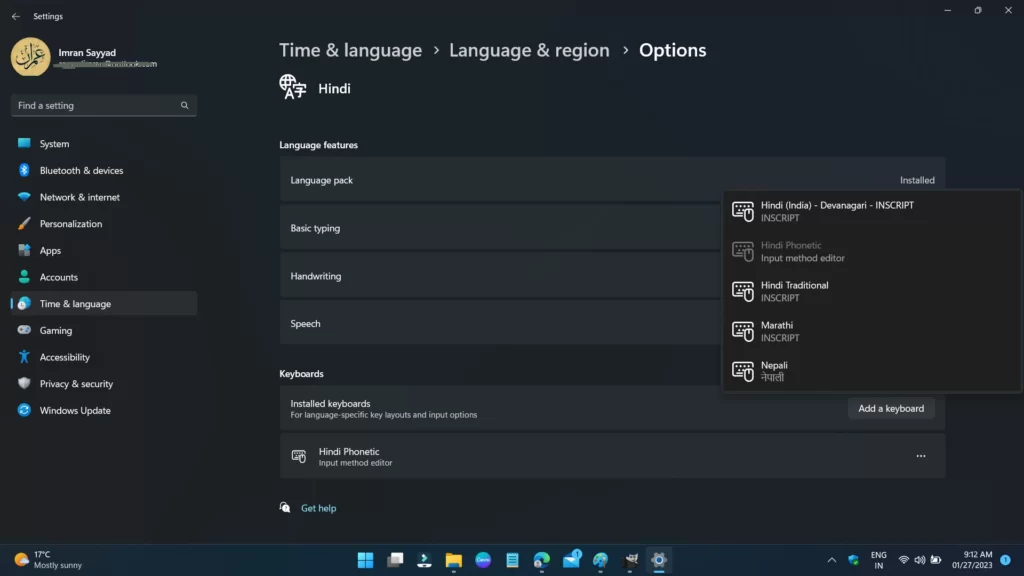
- In the same Language menu, click on “Hindi” and select “Options.” Under the “Keyboards” section, click on “Add a Keyboard” and select “Hindi Phonetic” from the list.
Step 3: Open MS Word
Once Hindi language support is installed, open MS Word by searching for it in the start menu or by clicking on the “Start” button and typing “Word” in the search bar.
Step 4: Select Hindi as the Language
Once MS Word is open, go to the “Review” tab, and click on “Language.” Select “Hindi” from the list of languages. This will change the language of the document to Hindi.
Step 5: Enable Hindi Phonetic Keyboard
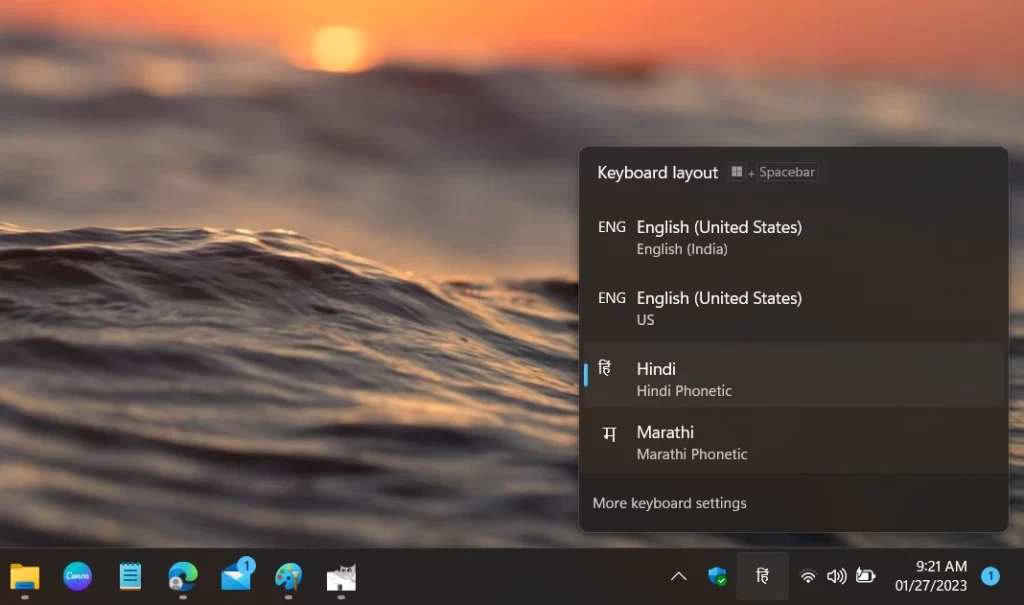
To enable the Hindi Phonetic Keyboard, go to the “Language” button in the taskbar and select “Devanagari – INSCRIPT” from the list of languages. This will change the keyboard layout to Hindi Phonetic.

Step 6: Write in Hindi
Now that the Hindi Phonetic Keyboard is enabled, you can start writing in Hindi. Simply type in Hindi using the English alphabets and the text will appear in Hindi. The Hindi Phonetic Keyboard maps the English alphabets to their corresponding Hindi characters, making it easy to type in Hindi.

Step 7: Format Text
Once you have written in Hindi, you can use the options in the “Home” tab to format the text, such as changing the font size and color. You can also use the “Paragraph” section to align the text.
Step 8: Save Your Document
Finally, once you are satisfied with your Hindi text, save your document by clicking on “File” and selecting “Save As.” Give your document a name and choose a location to save it.
Writing in Hindi in MS Word using the Hindi Phonetic Keyboard is a simple process once you have Hindi language support installed on your computer. With this guide, you can easily create documents in Hindi and express yourself in a new way.

