Do you know you can use the Microsoft PowerPoint application to create and print passport-side photo grids? Excited?
In this tutorial, I will explain the procedure for using the PPT tool to crop, background removal, and printing of passport-size photos.
Before we start note that the correct size of a passport photo is: 2 x 2 inches (51 x 51 mm). The head must be between 1 -1 3/8 inches (25 – 35 mm) from the bottom of the chin to the top of the head. A little bit of variation is acceptable.
How To Make Passport Size Photo In Powerpoint
Let’s begin by opening the Microsoft PowerPoint application. Clear all existing elements on the slide (Ctr+A and then Delete) and then insert the desired photo.
Step 1: Insert and Crop Photo
Insert your photo from the “Insert” tab or simply Copy and paste to the slide.
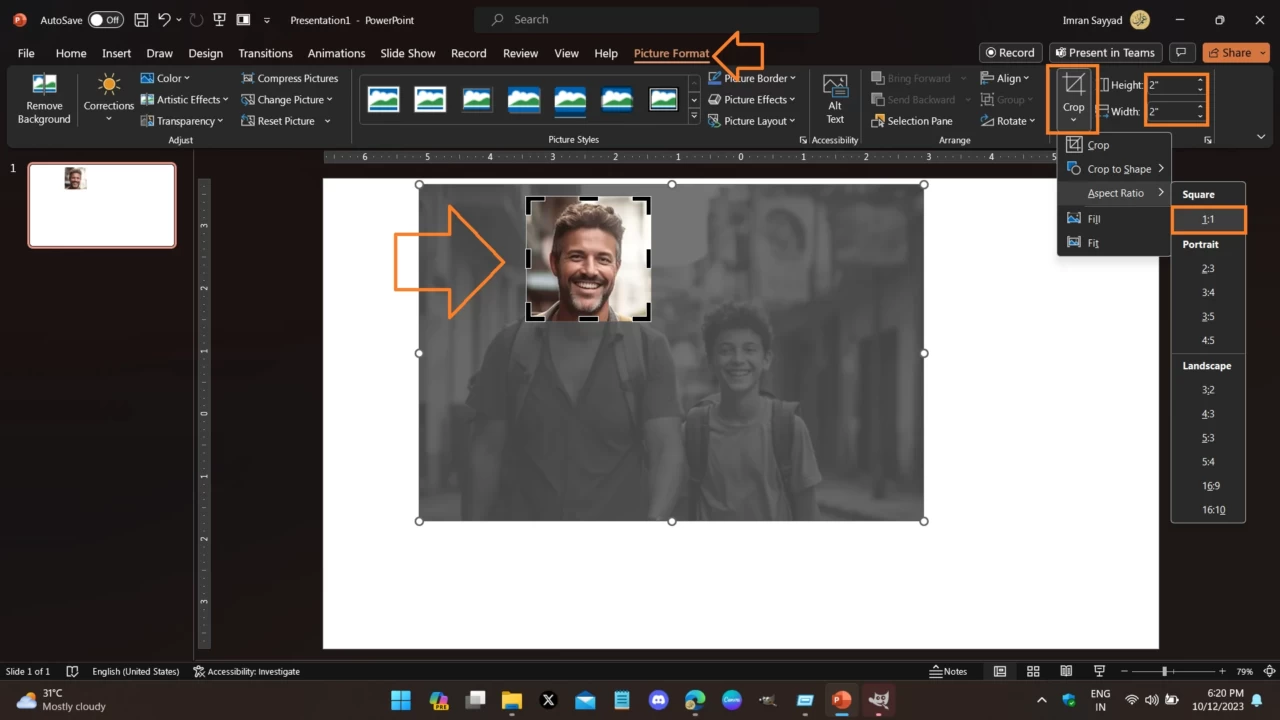
Then click on the photo and go to the “Picture Format Tab”, From there you can use the “Crop” tool.

Be sure you have selected the aspect ratio to “1:1″ and then set the Height and Width to 2” (Inches). As shown in the above screenshot.
Step 2: Remove the Background of the Image
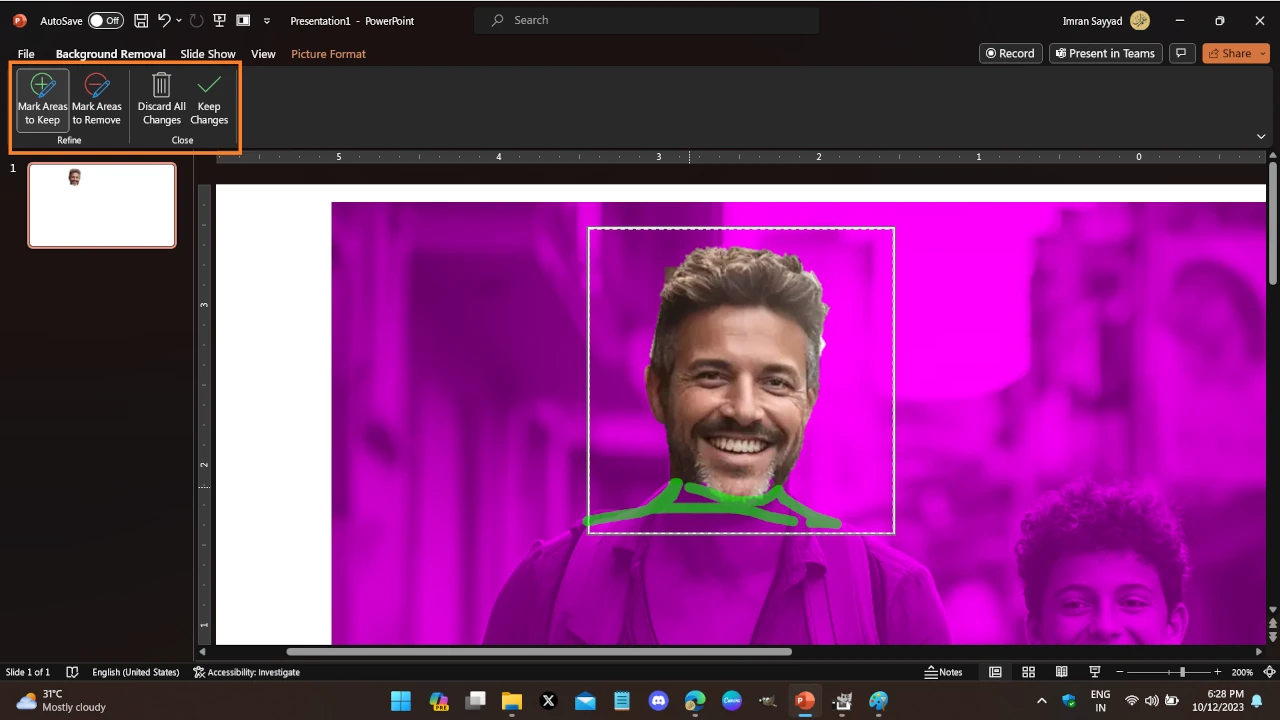
PowerPoint has an inbuilt background remover tool, just at the top left corner when you select an image in the PPT slide.

Use this tool to remove the background. It has two marking options “Green” to keep the area and “Red” to remove the area. Use them wisely. Zoom in (Ctrl + Scroll Up) to work on smaller details.
The result will be like this,

Step 3: Format Photo Background Color
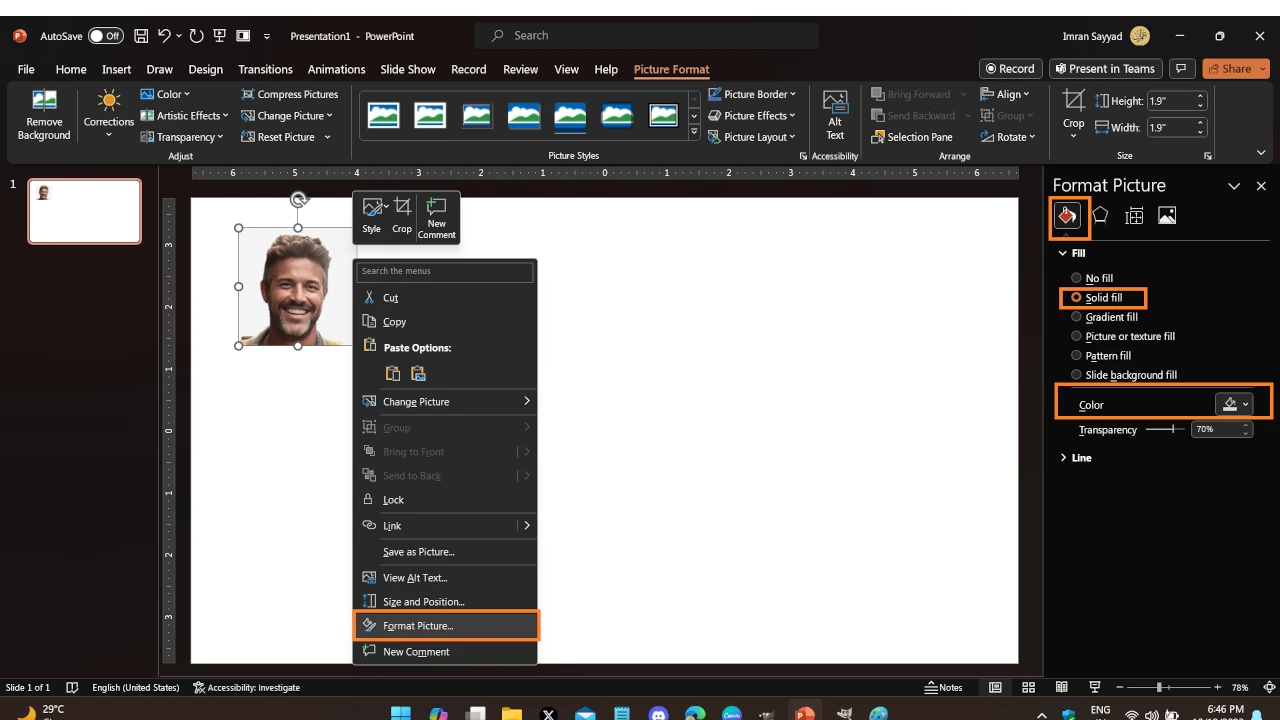
After background removal, the default background color of the passport-size photo will be white. You can change it by going to the “Format Picture” option and then solid-fill color settings.

Step 4: Create Multiple Photo Set For Printing
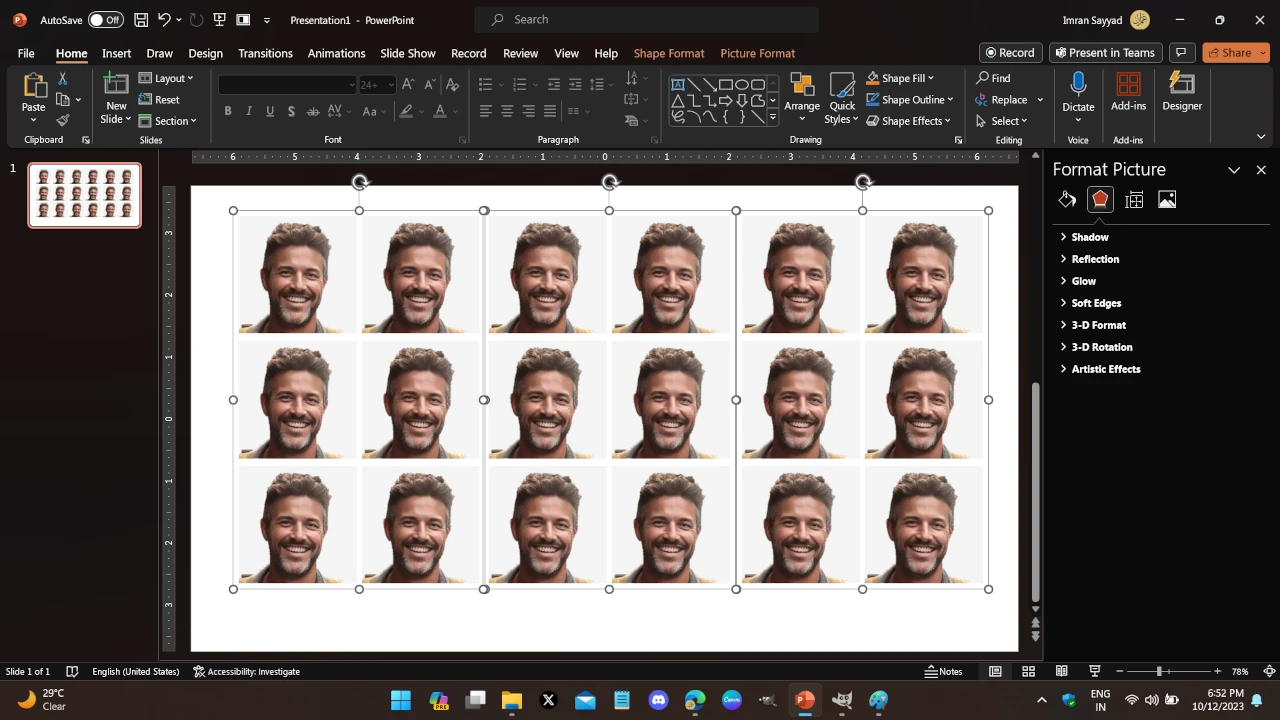
Now start copying and pasting images and arrange them side by side for printing. As shown in the following screenshot.

Step 5: Print Passport Size Photos from PowerPoint Template
Now, turn on your photo printer and then start printing from the “File-> Print” option. (Shortcut: Ctrl+P)
Make sure you have selected the correct paper format and printer in the print dialog.
This way you can easily repeat similar tasks many times. It will take no time to master this skill.
Here is a sample template used in the above tutorial,
