Paint 3D is a free image editing software that comes pre-installed on Windows 10 and later versions. It allows users to create and edit 3D objects and images, as well as basic 2D editing. One of the basic functions of Paint 3D is making an image transparent.
In this article, we’ll walk you through the steps of how to make an image transparent in Paint 3D.
Steps to Make an Image Transparent in Paint 3D
Step 1: Open Paint 3D
To make an image transparent in Paint 3D, you first need to open the application. You can do this by clicking on the Start menu and searching for “Paint 3D” in the search bar.
Step 2: Open the Image
Once Paint 3D is open, you can either create a new image or open an existing one by clicking on “Open” in the top menu and selecting the image you want to make transparent.
Step 3: Select the Image Portion to Keep
After the image is open, click on the “2D shapes” button in the top menu under the “Shapes” tab. Then choose the “Square” shape and drag it over the entire image to create a square. Then Click on the “Magic Select” button available on the right-side panel.
Alternatively, you can directly select part of the image to keep with the “Magic select” tool

Step-4: Adjust Cutouts
Zoom the image, and then check the outline of the focused object cut out from the original image. Use refine cutout option “Add” to include missed image parts and “Remove” to exclude unwanted selections.
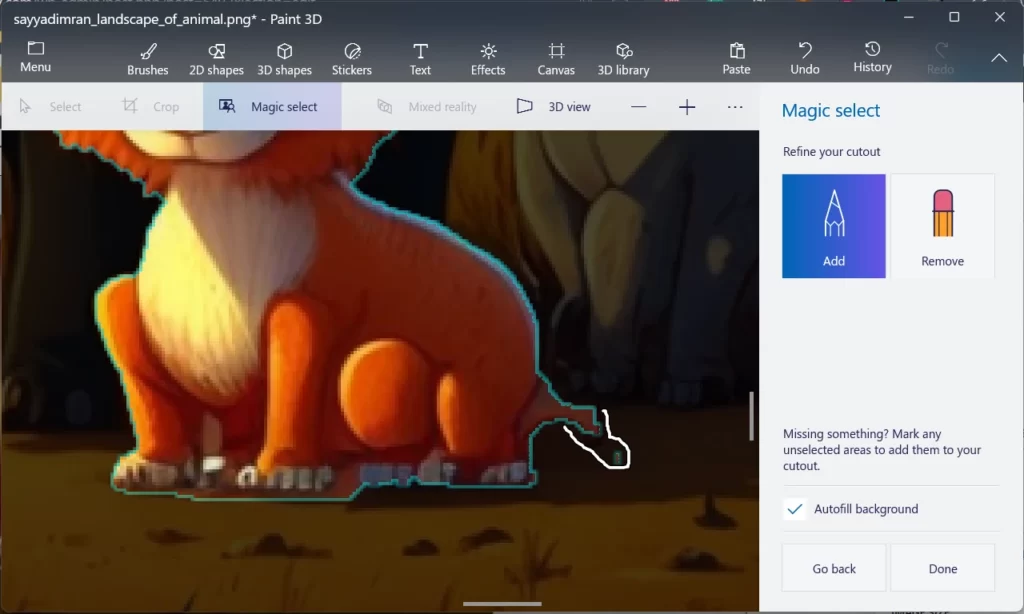
After you satisfy with the selection, click on “Done” it will separate the selected object from an image as a separate floating object.
Step 5: Drag Magic Select Output / Focus Object out of Canvas
Drag a floating sticker-like object out of the canvas. Zoom out to make it easier.
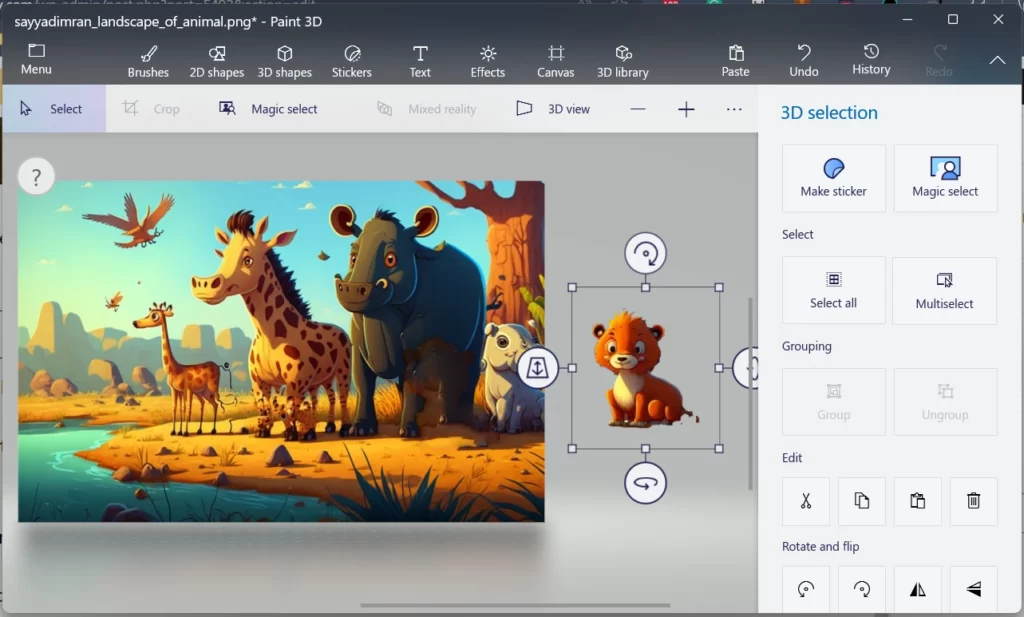
Step 6: Make the Image Transparent
Click on the “Canvas” tab in the top menu and select the “Transparent canvas” option. Now, select the whole remaining canvas except the removed object. And press “Delete” to remove it. Now canvas will become transparent and only selected objects will remain.
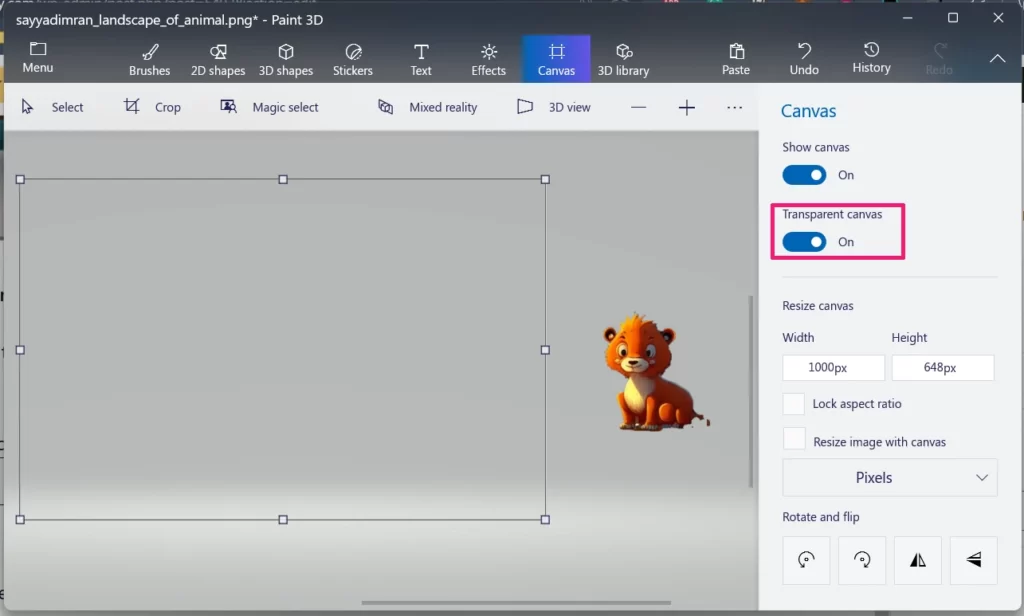
With the square in place, click on the “Crop” button in the top menu under the “Canvas” tab. This will crop the image to the size of the square and make the area outside of the square transparent.
Step 7: Move Back Object on Canvas
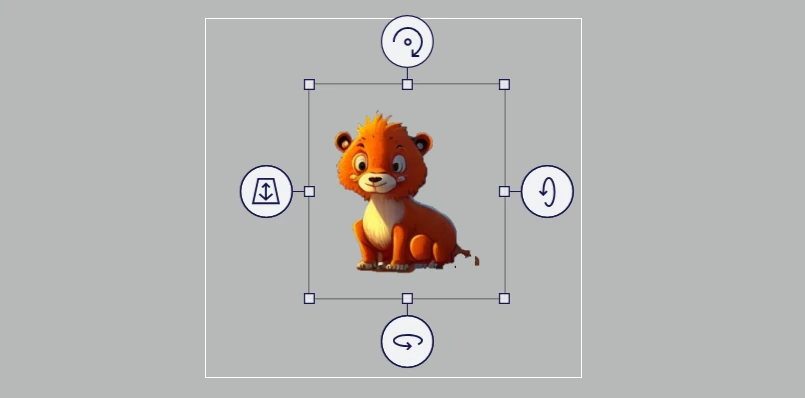
Now, move back and removed out focus object in the center of the canvas. Then, adjust the size and position canvas you want to keep.
Step 8: Save the Image
After you’ve made the image transparent, you can save it by clicking on “File” in the top menu and selecting “Save” or “Save as” to choose a new file name or location. Remember to set save as type to “PNG”.
Making an image transparent can be a useful way to blend images together or create unique effects. By following these steps, you can easily make an image transparent in Paint 3D using the magic select tool. With Paint 3D’s intuitive interface, even beginners can make images transparent with ease.

